
Today I am showing you an autumn or fall card with mushrooms.
I die cut a background panel from Pretty Pink Posh. I added some Antique Linen Distress Oxide ink in the middle of the panel. On top of that I added die cuts from the Papertrey Ink Into The Blooms: Mushrooms die set. I use cream and brown cardstock and inked the edges. I also added some ink to the leaves and leaf branches. I used 2 different green tones of cardstock for the greenery. I added a few clear pearls here and there and added a homemade sentiment to finish the card with.
I will be adding this to the following challenges:
Kaartjes Inspiratie #211 - Mushrooms
Hobby Vision #150 - Mushrooms
Carlin's Kaartenparadijs #87 - Forest
Girls Rebel #45 - Mushrooms
Dream Valley #347 - Autumn Colors
Till next time
Renate
Wednesday, October 22, 2025
An Autumn Card
Saturday, October 18, 2025
A Cake Pop Halloween Card

Today I am showing you a halloween card made with cute cake pops.
I die cut the cake pop dies from Pretty Pink Posh in halloween colors. I added foam tape behind the cake pops. I die cut the sentiment strip from A Pocket Full of Happiness. I added the cake pops and the sentiment onto a piece of vellum. I then added some foam tape behind the vellum underneath the die cuts to adhere the panel to a piece of desinger papers. The paper is a digital paper from the Gnome Halloween collection of Nitwit Collections. I added some glitter enamel dots from Carlijn Design. I adhere everything onto a purple cardstock panel and then onto a white base card. Totally halloween but not creepy. This would be nice to give to a little kid I think.
I will be adding this to the following challenges:
Cut It Up #341 - Add Embellishments
Paper Craft Crew #643 - Create A Halloween Treat of Favor
Papercraft #123 - Spooky Delights
Double D Challenge - Halloween Colors
Creative Crafting Uncles #70 - Halloween
Shopping Our Stash #558 - Hey Ghoulfriend
Daisy Chain #101 - Halloween and/or Autumn
Crafty Calendar October 2025 - Halloween
The Paper Funday #81 - Anything Goes Optional Cute
If You Give A Crafter A Cookie #209 - October Spooky Fun
Simon Says - Add Some Text

Tuesday, September 30, 2025
A Love Letter Card

Today I am shwoing you a love letter card. You can use this on any occassion but it kind of looks like it would fit Valentines Day pretty good also.
I made a square base card of 15 cm. I added a panel of 14,5 cm on that. I then cut a white panel of 14 cm and embossed it with the heart border embossing folder of Charlie Und Paulchen. After that I took one of my homemade mylar stencil with a square that was just large enough to add over the part in the middle that had no embossing. I added some splatters with red paint on it. While this was drying I dic cut the envelop of Alexandra Renke. I die cut some hearts out of various heart sets and I also had a die that die cut the tiniest hearts ever. I added these in between the splatters on the embossed panel. I popped up the envelp with the hearts onto some foam to give it dimension. I added the homemade sentiment and another heart and my card is ready. A lovely CAS card for that special loved one.
I will be adding this to the following challenges:
Alphabet Challenge - L Is For Love Letters
Till next time
Renate
Wednesday, September 24, 2025
A Christmas Bunny Card


Today I am showing a similar card like the previous post. This time it is a Christmas bunny card.
I took some designer papers with red snowflakes from Nitwit Collections. I added it onto the sentiment circle by Marianne Design CR1595 that I die cut in white. Underneath I added a red circle so you can see the sentiment circle even better. I die cut some balloons of Pretty Pink Posh in red and gold metallic cardstock. I die cut the bunny from Marianne Design COL1463 and the scarf and hat from the set COL1438. I added some embossing to the basket using a 3D embossing folder with a basket pattern. I added it all onto a white scalloped base card.
I will be adding this to the following challenges:
Girlz Creative Christmas #143 - Christmas Bunny
Simon Says Stamp Wednesday - Anything Goes
Critter Crazy 102 - Anything using a Critter Goes
Crafty Animals #98 - Anything Goes Including an Animal
Till next time
Renate
Sunday, June 15, 2025
Christmas Birdhouse Card

At this moment I am not making a lot of cards because the weather is so lovely and I spend a great deal of time outside. We do a lot of bike rides several times a week when the weather permits it or I just sit in my garden and then I am unable to do any papercrafting so at bit fewer posts at the moment. I do try to make some cross stitch cards because that I can do even outside sitting in my yard under my party tent. As far as theme I don't mind making christmas cards all year long.
So today I am showing you another card I made for Christmas. I made the background paper myself. I didn't use AI for that I still make it myself from scratch using PSP. That way I can get the perfect color that I am looking for. The Merry is from an alphabet of Lawn Fawn. I die cut the letters twice and stacked them together to get a bit of dimension and then I added only the top of the letters into another color. The top and bottom of the birdhouse are from Pretty Pink Posh. The little house itself I made myself because I needed it to be a bit larger. I then used a circle die to cut the circle in the middle. I stacked the birdhouse onto foam for dimension. The leaf branch is from a swing set of Studio Light. And the birds are from Poppy Stamps. I added some ink here and there to make them look more real. The snowflakes are from several different die set.
I love combining die set from more then just 1 brand as I feel all brands have something lovely to offer and you can really use all of them together to make that one special card.
I will be entering this in the following challenges:
Peace On Earth Christmas #90 - Anything Christmas Goes
Sparkles Christmas June 2025 - Include the word Merry
Krafty Chicks #772 - Christmas
Till next time
Renate
Monday, June 9, 2025
Another Christmas Card
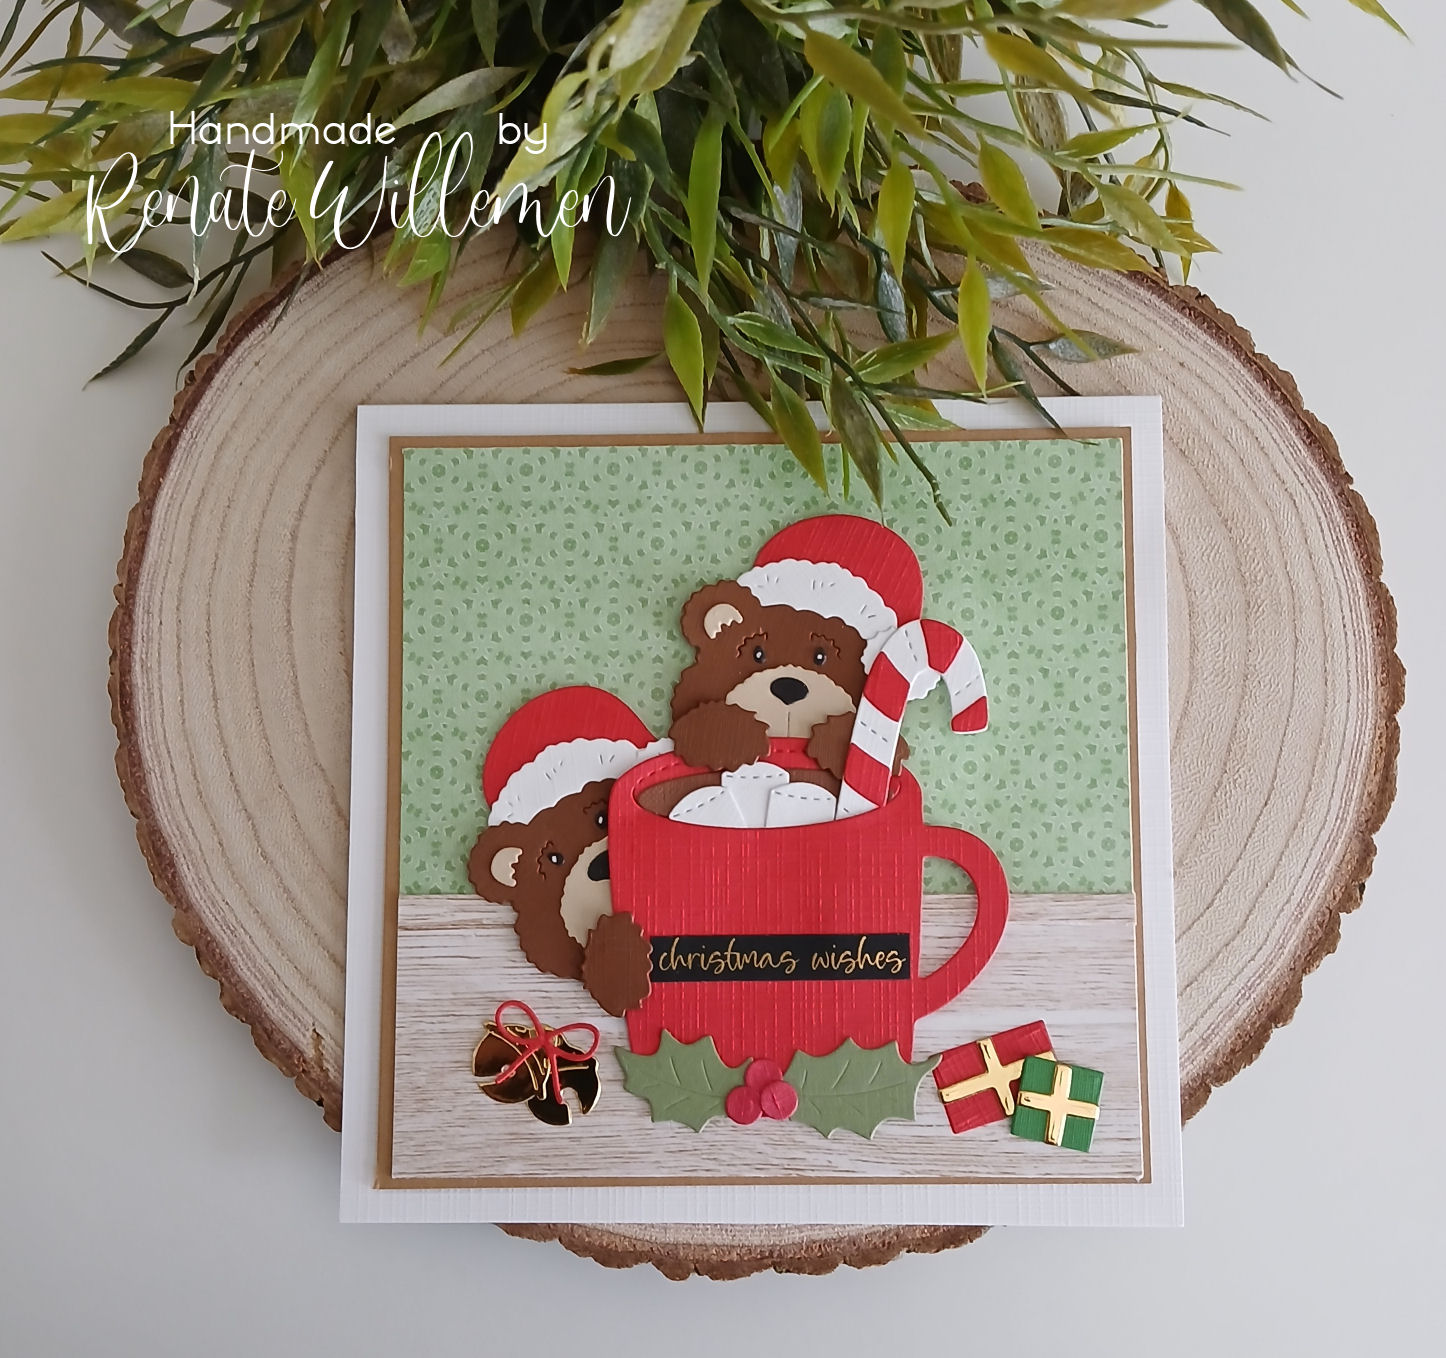
Today I am showing a christmas card for my stash for upcoming christmas. I always like making christmas cards even in the summer when the sun is shining bright.
The base card is white. I put a kraft panel on it. On the kraft panel I added a piece of designer paper of Nitwit Collections and the wood designer paper is from Lemoncraft. The bears peeking behind a large mug are from Cottagecutz. I die cut 2 bears. The large mug with the marshmallows and the candy cane are of Pretty Pink Posh. I die cute 2 bells in gold metallic cardstock. I also added some poinsettia leaves but don't remember the brand for these. This also goes for the packages. I forgot the brand for that too. The sentiment is homemade and foiled with gold foil.
I feel this is a lovely cute christmas card to get and I am sure I will put a smile on the face of the recipient.
I will enter this one in the following challenge:
Caffeinated Christmas #42 - Anything Goes Using Christmas Coffee, Tea and/or Cocoa
The Christmas Kickstart #99 - Christmas Critters
The Holly And Ivy #186 - Anything Christmas Goes
The 12 Months Of Christmas #123 - Anything Christmas Optional One or More Layers
Peace On Earth Christmas #89 - Anything Christmas Goes
First Cup #3 - Anything Drinks Goes
Girlz & The Art Of Letters #2 - Letter B (mine is Bear or in Nederlands Beer)
Till next time
Renate
Saturday, June 7, 2025
A Requested Birthday Card


Today I am showing a birthday card made upon request. For my job that brings in the money to afford my hobbies I assist people, mostly elderly, that need help keeping their house clean. One of my clients asked me to make a birthday card for her great grandchild who is having her very first birthday.
She took a look at all the photos in my albums on Pinterest and she like a similar one like this so I remade it for her. Ofcourse a few small differences as I never ever make the same card twice. Sometimes they seem alike but I always do small changes so it will guarantee the uniqueness of the card.
I will enter this in the following challenge:
Unicorn #110 - Not Square
Aud Sentiments #326 - Fun Folds + a Sentiment
Dragonfly Dreams June 2025 - Use One Or More Butterflies
AAA Birthday Game #74 - No Stamping
Everybody Art #580 - Butterflies
A Cut Above June 2025 - Anything Goes Using A Die Cut
Kaartjes Inspiratie #206 - Butterflies

Till next time
Renate
Thursday, April 17, 2025
Circle Christmas Cupcake Card

Today I am showing you this delicious card that I made for my christmas stash.
I die cut a scalloped circle base. The digital background papers are from Nitwit Collection. The cupcake is from Pretty Pink Posh. The leaves and poinsettia are from my stash. The snow border is from Papertrey Ink Trees of Cheer. All the stars are die cut out of gold metallic cardstock.
I will be adding this to the following challenge:
Christmas Kickstart #97 - Positively Poinsettias
CD Sunday Plus #156 - Anything Digital Goes
Till next time
Renate
Sunday, March 9, 2025
Shamrock Shaker Card

So today I am showing you a shamrock shaker card.
So we don't celebrate St. Patricks Day but we do associate the color green with luck so I made this cute shamrock shaker card.
I embossed the green panel with an unbranded shamrock embossing folder. I then had some green strips left so I cut a shamrock out of that using the Pretty Pink Posh Shaker die. I cut a whole bunch of outlines and stacked them together to get the height to where it is high enough to hold the shaker embellishments.
For the shaker materials I used various colors of white, green and gold and used sequins, small 2 mm pearls and seed beads. I die cut the sentiment for green metallic cardstock so that it would match the card. The shadow of the sentiment and the card itself are in off white.
I will be entering this in the following challenge:
Creative Crafting Uncles #62 - Embossing
Creative Fingers #296 - Anything Goes
Can You Handle The Pressure - Lucky and/or St. Patricksday
Till next time
Renate
Monday, January 20, 2025
A birthday card for my son

The color combinations is in grey, aqua and white.
Renate